Below you will find a step by step screen shot walk through on how to register a domain name at Godaddy.com. I will include helpful tips, explanations and personal preferences on the way. Registering a domain name will be a breeze after you read through my tutorial. If you’re a hard charger you can open up a web browser and do the steps alongside me.
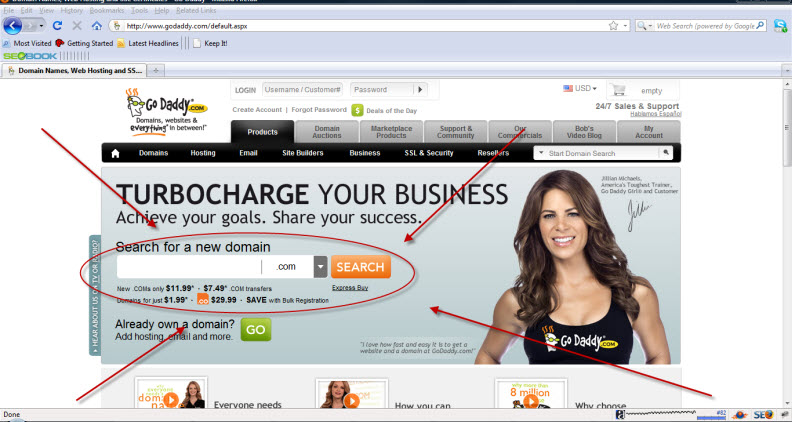
1)Go to Godaddy.com I have put a red circle around the search box. This is where you type in the domain name you wish to register. After you type it in click on the search button.
*Tip: If your website is going to be used for a business let’s say carpet cleaning you might want to register www.CarpetCleaningMyCity.com where “My city” is the city you do business in and “Carpet cleaning” is the service you are providing vs. registering www.ThomasCleaningServices.com where “ThomasCleaningServices” is your business name.
The reason for this is because people searching for a carpet cleaning company are going to be searching for “carpet cleaning orlando” or “carpet cleaner orlando”. Since your domain name matches the keyword they’re searching for you get extra “points” with google for ranking for that keyword. If you need help deciding a domain name send me a message at the contact me tab and I’ll be glad to help. 🙂
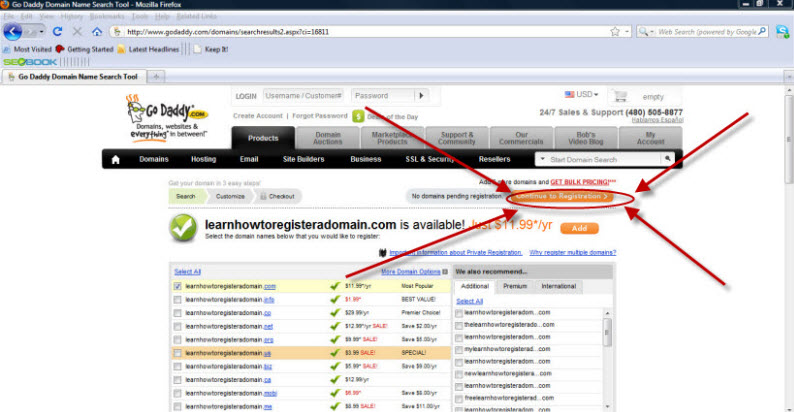
2)This next image shows the screen that will appear once you are successful. Click on the “Continue to Registration” button that I have put a red circle around. If the domain name that you want to register is already taken try a different domain name. You might have to try several domain names to find one that isn’t taken.
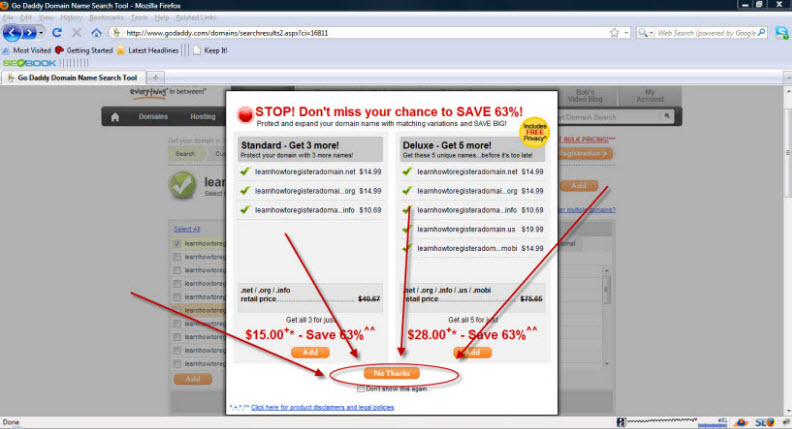
3)After you click on the “Continue to Registration” button, you will get a pop up as shown below. It is asking you if you want to register different TLDs such .org .net .info. Ninety-nine percent of the time I just register the .com.
The one occasion I did register a .info, I did it to take advantage of bulk domain registration discount pricing. If you register five or more domains at one time you get a discount. Don’t register 4 more domains just to get a discount if you don’t know how you are going to use them. Most likely you’ll never use them, and have wasted the extra money.
I just click on the “No Thanks” button.
4)The next step is to enter your registration details. You enter first and last name, email address, street address, city, country, state, zip and phone number. If you ever go back to register a domain name you can enter your existing log in name and password and skip having to fill out the contact details again.
*Tip: I would advise you to register all your domains under one account because it makes them easier to manage. Instead of having to remember multiple login names and passwords.
*Note: At the bottom of the image you will see where it says “This information is to populate your WHOIS listing”. The WHOIS listing is a database that shows who owns a particular domain name. If you don’t want your personal data listed in the WHOIS listing then godaddy let’s you pay for a service that put’s their contact information in the whoislisting, and then they contact you if someone is trying to get in touch with you in regards to your domain.

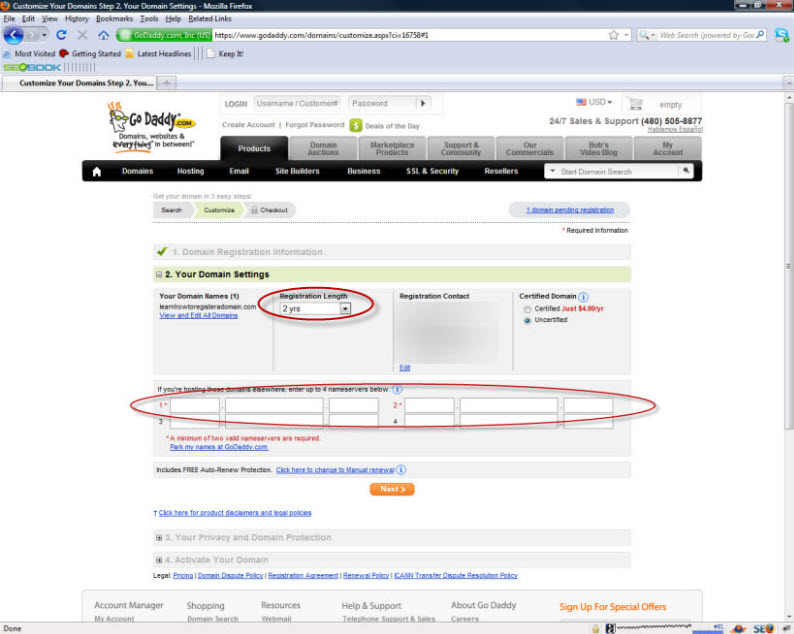
5)On the next screen you can modify the domain settings. Here you can change the number of years to register the domain for. You can register it for 1 year up to a max of 10 years. You can edit your contact details.
Godaddy gives you the option to certify your domain. If you select your option they will send an email to the administrative, technical, and registrant email addresses listed when registering the domain. They will verify the phone number you listed. Once they have confirmed this a computer-generated Domain Origination Certified Seal is placed in the whois listing for that domain and you can place a digital site seal on your website. I never bother with this.
The last thing you can do is set up your name servers. If you already have your hosting you can add it in here, but if you don’t have it you can always set it up later.
6) The next screen you will arrive at is the privacy and the domain protection. Standard is free, but your contact information is listed in the whois database. My personal preference is the Deluxe just so I have a little bit of privacy. I don’t like my personal information being listed. This is really your preference, I know people who go with the standard and I know people who opt for it.

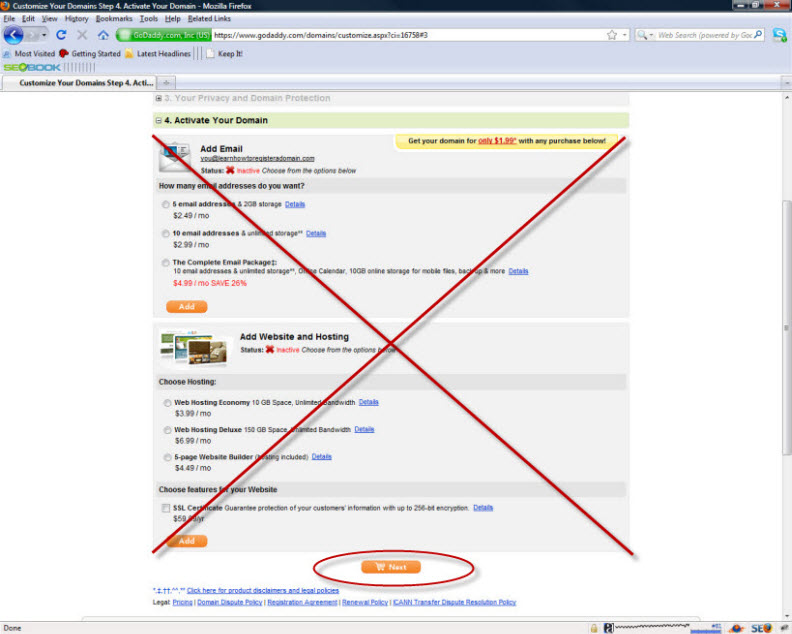
7) The final options godaddy gives you is email and hosting. I use hosting and email through hostgator, so I just ignore these and click on the next button.
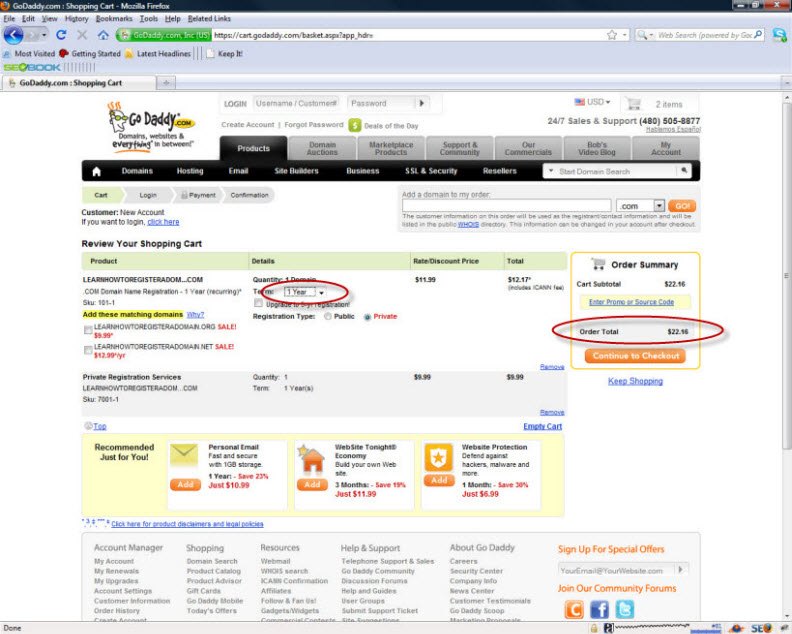
8) Now we are at the checkout screen. In the top red circle you can change how long you register the domain for. I’m not sure how long I want to keep this for, so I’m going to change it to one year. The bottom red circle shows where you can remove the business registration. I used to leave this on there, but I’ve never seen a difference so I just take it off to save a buck or two since I’m a tight wad ;).
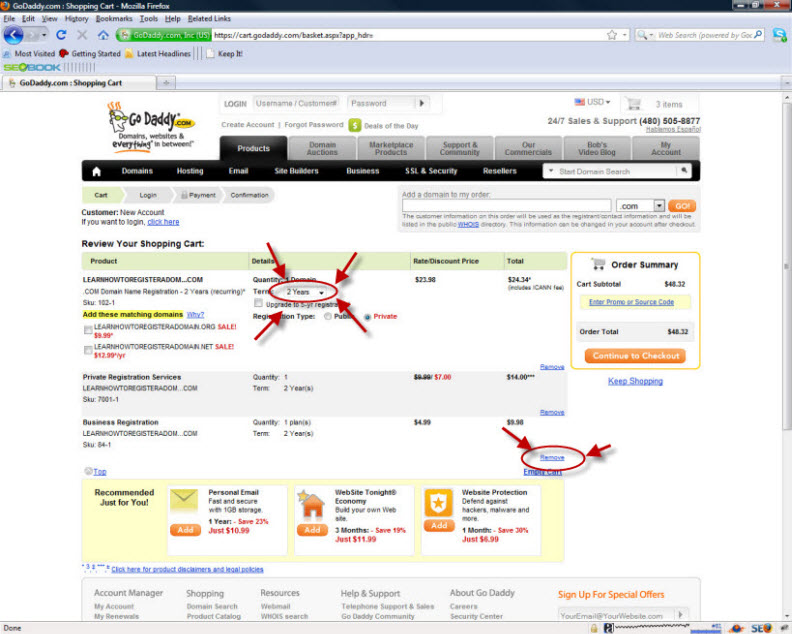
9) The screen below I show you the updated registration length and the new price which comes out to $22 and some change.
10) Don’t worry we’re almost finished! After you click on the continue to checkout button you will see the page below. Just fill in your information. I’ve selected business since I’m using a business checking account to register this domain. Select whatever applies to you. Select a password and enter your email address under login information box.
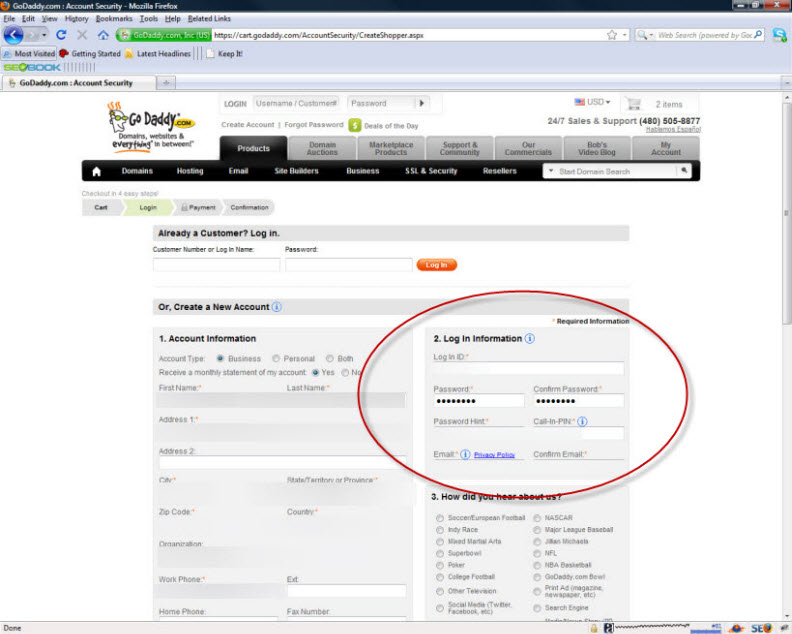
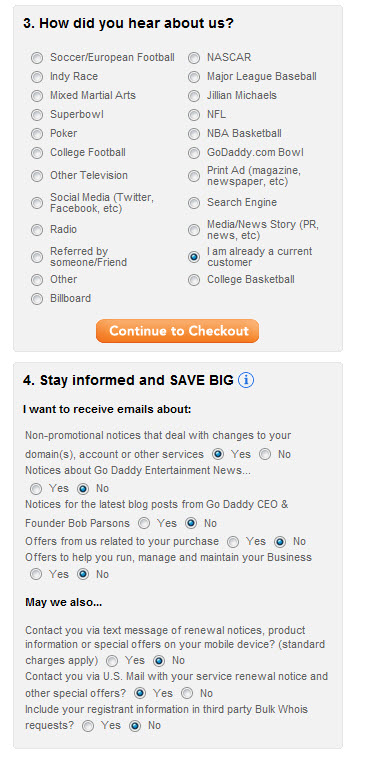
11) I couldn’t include the entire screenshot in the last image so here is the rest of it. Once you scroll down select how you heard about godaddy. Then below that you can select what you want godaddy to send you emails about. These are really your personal preference. Click on the Continue to checkout button.
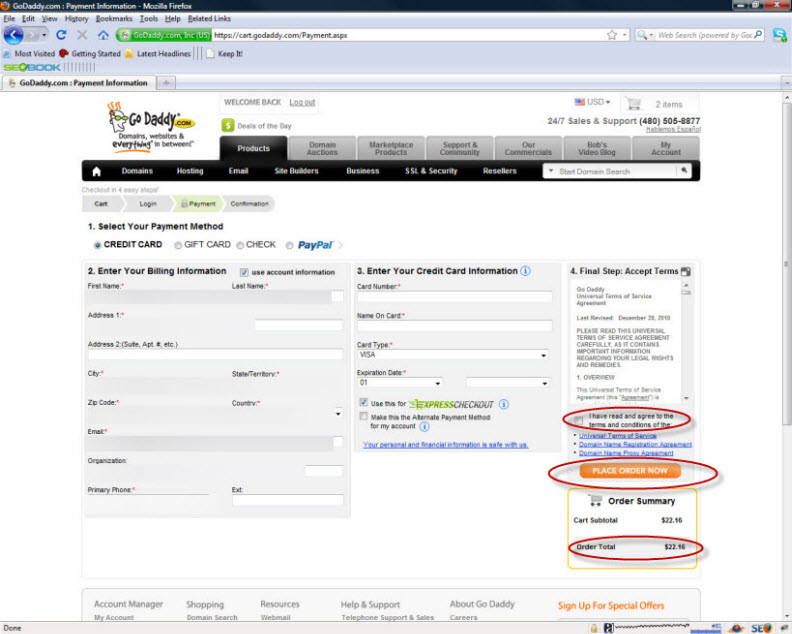
12) Now we finally get to checkout! Yay!!! Enter your billing information and credit card info. Read the terms and conditions, check the box, and click the “Place order now” button. Congratulations! You’ve just registered a domain name!
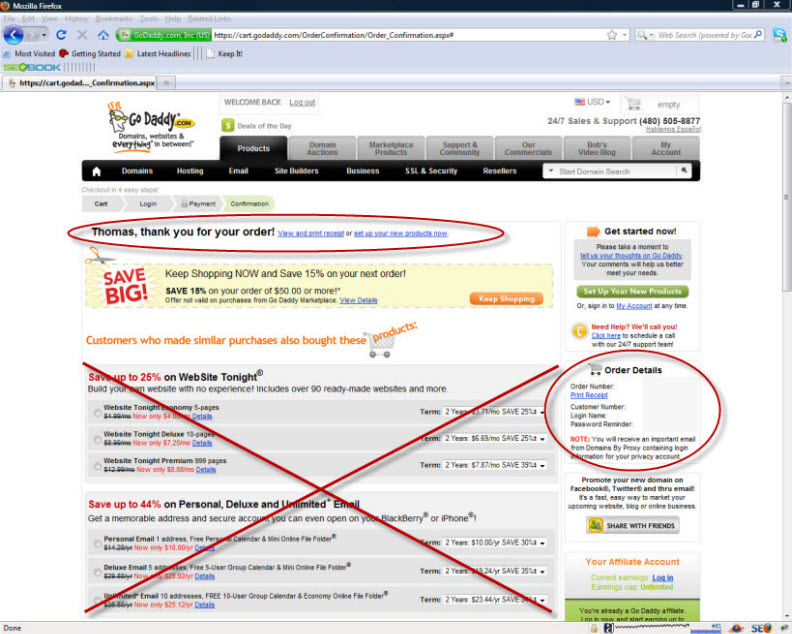
13) You are finished. You have to look closely at the screen to show that you’re finished. As always Godaddy once again gives you the option of buying more stuff.
If you have any questions or comments leave them in the comment sections below, and I’ll be sure to get back to you!
Thomas
